You can customize DateTime editor arrow image of WebInput.
In this topic, you will learn how to customize DateTime Editor arrow image in calendar header section and arrow image in dropdown section.
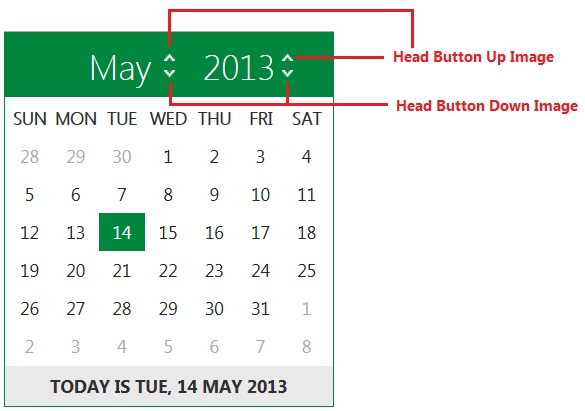
To customize DateTime Editor arrow image in calendar header section
- Click WebInput instance and press F4.
- Set the DateTimeEditor - IsEnabled properties to True
- Set the DateTimeEditor - HeaderButtonUpImage properties to URL image’s path.
- Set the DateTimeEditor - HeaderButtonDownImage properties to URL image’s path.
- Run the Project.
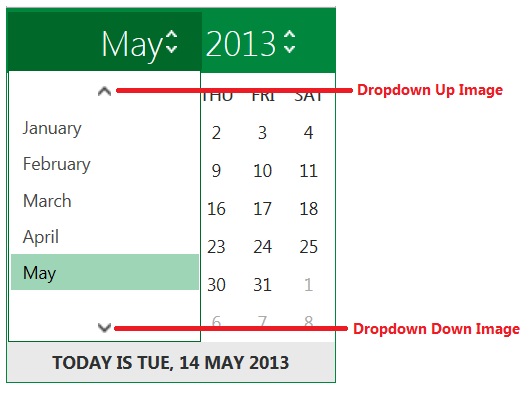
To customize DateTime Editor arrow image in dropdown section
- Click WebInput instance and press F4.
- Set the DateTimeEditor - IsEnabled properties to True
- Set the DateTimeEditor - DropDownButtonUpImage properties to URL image’s path.
- Set the DateTimeEditor - DropDownButtonDownImage properties to URL image’s path.
- Run the Project.